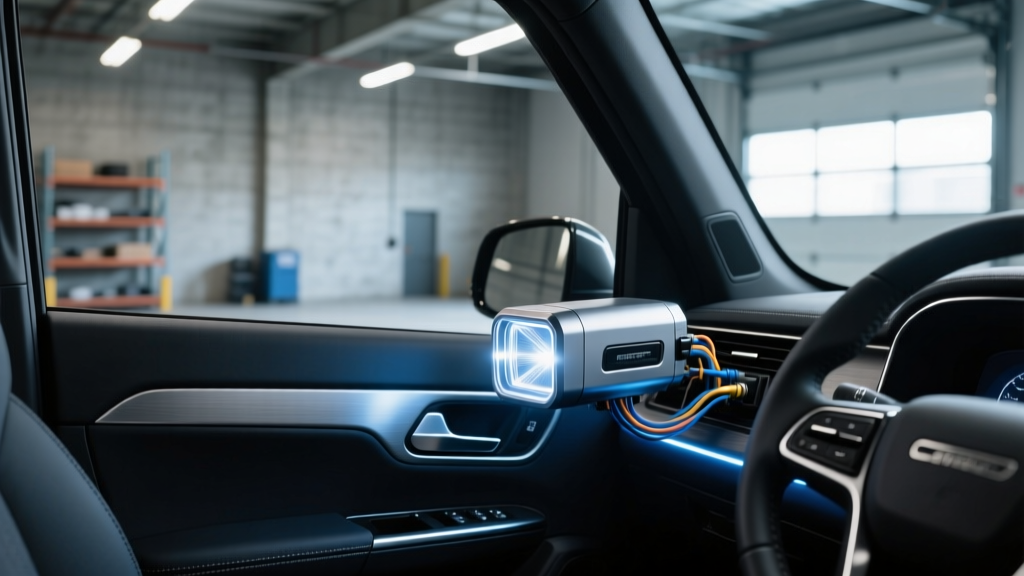
Commercial Vehicle Flash Unit Case Guide - CarInteriorMix
Walk up to a work van, delivery truck, tow rig, or service ute at night and you?ll notice one interior detail that quietly keeps the whole operation safer: the warning light system. Whether it?s hazard flashers, rooftop beacons, grille strobes, or work lights, many commercial vehicles rely on a flash unit (also called a flasher relay/controller) to create a consistent, visible flash pattern.
What most owners and enthusiasts overlook is the flash unit case?the housing that protects the electronics from heat, vibration, dust, and moisture, and ensures the unit mounts securely under a dash, behind trim, or inside a console. A cheap or mismatched case can lead to intermittent flashing, blown fuses, rattles behind interior panels, or a complete failure when you need visibility the most.
This guide breaks down what a commercial vehicle flash unit case is, how to choose the right one, how to install it cleanly inside your vehicle, and what mistakes to avoid. You?ll also find practical product-style comparisons (so you can shop smarter), plus a quick FAQ at the end.
What Is a Flash Unit Case (and Why It Matters)?
A flash unit is the electronic module that controls flashing for turn signals, hazard lights, auxiliary warning lamps, or specific commercial add-ons like LED beacons and strobe packs. The flash unit case is the protective enclosure and mounting interface for that module.
Why the case matters in commercial vehicles
- Vibration resistance: Vans and trucks see constant vibration. A weak case can crack or loosen, causing internal solder joints or connectors to fail.
- Heat management: Some flashers and controllers warm up under load. A properly designed case dissipates heat and prevents hot spots against trim or wiring looms.
- Moisture/dust protection: Fleet vehicles often have wet boots, spilled drinks, and jobsite dust. Better cases reduce contamination risks.
- Secure mounting: A flasher that bangs around behind the dash can wear through insulation, create noise, and damage connectors.
- Interior fit and finish: If you care about your cabin, a tidy installation with the right case looks OEM?especially in visible areas like the lower dash or center console.
Types of Flash Units Used in Commercial Vehicles
Before choosing a case, confirm what kind of flash unit you?re dealing with. Commercial setups vary widely.
1) Standard turn-signal/hazard flasher relays
- Typically 2-pin or 3-pin (sometimes 4/5-pin) plug-in modules
- Often located in the fuse/relay box or under-dash relay panel
- May be electronic (solid-state) or thermal (older style)
2) LED-compatible flashers
- Designed to prevent hyperflash when switching from halogen to LED bulbs
- Often have a different internal load handling and sometimes different housings
3) Warning light controllers (multi-output)
- Controls multiple strobe heads, beacons, or grille lights
- Often includes selectable patterns and synchronization options
- May mount inside the cabin (under seat, behind console, in a rear bulkhead compartment)
4) Strobe power supplies (older xenon systems)
- Higher voltage output (extra attention to insulation and mounting)
- More sensitive to moisture and vibration?case quality is critical
Flash Unit Case Materials and Build Quality
Case construction influences lifespan and installation quality. Here?s what you?ll commonly see.
ABS/plastic housings
- Pros: Lightweight, affordable, non-corrosive, common for OEM-style relays
- Cons: Can become brittle over time in high-heat environments
- Best for: Standard relay replacements, interior mounting away from direct heat sources
Aluminum or metal cases
- Pros: Better heat dissipation, robust mounting, high vibration resistance
- Cons: Can transmit vibration noise if not isolated; needs corrosion-resistant finish
- Best for: Multi-output warning controllers, higher-load modules, heavy-duty fleet use
Sealed/weather-resistant cases
- Pros: Better protection against moisture and dust; ideal for under-seat or rear-cargo mounting
- Cons: Slightly bulkier; must still allow heat to escape
- Best for: Work trucks exposed to wet gear, detailing chemicals, jobsite debris
How to Choose the Right Flash Unit Case
A flash unit case isn?t ?one-size-fits-all.? Use this checklist to avoid buying something that doesn?t mount, doesn?t fit, or stresses the wiring.
Compatibility checklist
- Connector type: OEM plug-in relay, pigtail wiring, Deutsch connector, or screw terminals
- Pin configuration: 2/3/4/5 pin relay patterns; ensure the case accommodates the plug and strain relief
- Module dimensions: Measure available space behind your dash panel or console
- Mount style: Clip-in bracket, bolt-on tabs, adhesive pad, or DIN-style rail
- Heat considerations: If your controller drives multiple LED heads, pick a case designed for heat dissipation
- Service access: You should be able to reach it later without removing half the interior
Real-world example: delivery van with intermittent hazards
A common scenario: a delivery van has hazards that work ?sometimes.? The relay tests fine, but the case clip is broken and the relay is dangling. Each bump slightly loosens the connector until the circuit opens. A new case/bracket (or replacing the relay with a unit that includes a proper retention clip) fixes the issue permanently and prevents future wiring damage.
Step-by-Step: Inspecting and Replacing a Flash Unit (Case Included)
This workflow applies to many commercial vehicles. Always consult your service manual for vehicle-specific locations and wiring colors.
Tools and supplies
- Trim removal tools
- Flashlight/headlamp
- Socket set or screwdriver set
- Electrical tape and zip ties
- Dielectric grease (optional, for connectors)
- Multimeter or test light (helpful for diagnostics)
1) Confirm the symptom
- Test turn signals (left/right) and hazards.
- Listen for relay clicking (some electronic units are silent).
- Check if the issue appears only when hitting bumps or when the cabin is hot.
2) Locate the flash unit
- Check the owner?s manual or fuse box diagram for ?TURN,? ?HAZ,? ?FLASHER,? or ?BODY ECU.?
- In many vans/trucks, the flasher relay is in the interior fuse panel near the driver?s knee area or under the steering column.
- For auxiliary warning systems, look under a seat base, behind a bulkhead panel, or in a center console cavity.
3) Disconnect power safely
- Turn the ignition off.
- For controllers tied to constant power, disconnect the negative battery terminal.
- Wait a minute for any modules to power down.
4) Remove trim and access the unit
- Use trim tools to avoid gouging interior plastics.
- Keep clips organized?commercial interiors often use multiple clip lengths.
5) Inspect the case and mounting
- Look for broken tabs, cracked housing, or a missing bracket.
- Check for rubbing marks where the unit has been bouncing against wiring or HVAC ducting.
- Inspect the connector for loose pins or green corrosion.
6) Replace or re-case the unit
- If it?s an OEM-style relay: unplug it and plug in the replacement (or fit it into a new retention bracket/case if applicable).
- If it?s a wired controller: transfer the module into the new case (when designed for it) and ensure grommets/strain reliefs are seated.
- Apply a small amount of dielectric grease to connectors if you?re in a humid environment (avoid over-applying).
7) Mount it correctly (no rattles, no wire stress)
- Use factory mounting points when possible.
- Add thin foam tape between a metal case and body panel to prevent buzzing.
- Route wiring so it has a gentle bend?no tight kinks at the connector.
- Zip tie wiring to a stable loom anchor, not to moving pedals or steering components.
8) Test and reassemble
- Reconnect the battery.
- Test hazards/turn signals and any auxiliary flash patterns.
- Reinstall trim carefully and confirm nothing pinches the harness.
Product Recommendations and Comparisons (What to Look For)
Rather than pushing one brand, use these ?buying tiers? to match your vehicle and use case. When shopping online or at a fleet supplier, these criteria help you quickly filter out weak options.
Tier 1: OEM-style replacement relay with proper retention
Best for: Stock turn/hazard circuits and simple LED bulb swaps.
- Look for ?LED-compatible electronic flasher? if you?ve converted bulbs to LED
- Ensure the case includes:
- Correct pin layout
- Solid latch/clip retention (no wobble in the socket)
- Heat-resistant plastic if mounted near HVAC ducts
Tier 2: Heavy-duty flasher controller in a vibration-resistant case
Best for: Work trucks with beacon lights, grille strobes, or multiple LED heads.
- Case features worth paying for:
- Reinforced mounting tabs
- Sealed or gasketed cover
- Proper strain relief for harness exits
- Bonus features:
- Pattern memory (keeps your last setting after power off)
- Sync capability with other modules
- Replaceable fuse on the case
Tier 3: Fleet-grade sealed controller box with metal housing
Best for: High-mileage commercial fleets where downtime costs money.
- Look for:
- Aluminum housing for heat management
- Ingress protection claims (sealed connectors/grommets)
- Clear labeling for inputs/outputs (saves time later)
Placement Tips for a Clean, Interior-Friendly Install
Commercial vehicles don?t always give you a lot of ?nice? interior space to work with. A thoughtful placement keeps things serviceable and avoids rattles.
- Avoid direct heater duct airflow: Heat cycling can shorten module life.
- Keep away from pedal assemblies: One loose harness can become a safety hazard.
- Don?t bury it behind permanently installed shelving: You?ll regret it later.
- Use existing grommets and pass-throughs: Drilling new holes invites rust and water ingress.
- Label the harness: A small tag (?FLASH CTRL +12V,? ?PATTERN,? ?SYNC?) saves future troubleshooting time.
Common Mistakes to Avoid
- Buying a case that ?almost fits?: Forcing a module into a tight cavity can pinch wiring or crack the housing.
- Ignoring connector strain relief: The case should support the harness so vibration doesn?t work the pins loose.
- Mounting with double-sided tape only: Tape can soften in heat. Use screws/bolts or a proper bracket when possible.
- Mixing LED bulbs with a non-LED flasher: This causes hyperflash and can trick you into thinking the case is faulty.
- Skipping fuse protection: Auxiliary flash systems should be fused correctly and close to the power source.
- Routing wires near sharp metal edges: If you must pass near an edge, use loom and a grommet.
Quick Troubleshooting: When the Case Isn?t the Only Problem
If you replace the case or flasher and still have issues, use this short diagnostic list.
- Rapid flashing: Usually LED load mismatch, a bulb out, or a poor ground?not the case itself.
- No flashing at all: Check fuse, ignition feed, ground, and connector pin fit.
- Works when cold, fails when hot: Heat-soak issue?relocate module or upgrade to a better heat-dissipating case/controller.
- Intermittent when driving: Loose socket retention, broken case clip, or harness strain.
FAQ: Commercial Vehicle Flash Unit Case Questions
Will a better flash unit case make my lights brighter?
No. Brightness is determined by the bulbs/LED heads and the electrical system. A better case improves reliability, reduces vibration-related failures, and helps the module maintain consistent flash patterns.
Do I need an LED flasher relay if I install LED turn signal bulbs?
In many vehicles, yes?unless the vehicle uses a body control module that can be programmed for LEDs or you add load resistors. An LED-compatible electronic flasher is usually the cleanest solution for traditional relay-based systems.
Can I mount a warning light controller under the seat?
Yes, as long as it?s protected from moisture and physical impacts (tools, boots, cargo). A sealed or well-ventilated case, secure mounting, and proper wire routing are the keys to a trouble-free under-seat install.
Why do my hazards work but my turn signals don?t (or vice versa)?
Some vehicles use separate circuits or separate control logic. It could be a turn signal switch, a body control module issue, a fuse, or a connector problem. The flash unit case is only one piece of the system?inspect wiring and switchgear if symptoms don?t match a simple flasher failure.
Is a metal case always better than plastic?
Not always. Metal is great for heat and durability, but a quality plastic case can be perfectly reliable for interior relay applications. Choose based on mounting location, vibration level, heat exposure, and how many outputs the controller drives.
What?s the easiest way to stop rattles after installing a new case?
Use the correct bracket, tighten mounting hardware, and add thin foam tape where the case could contact interior panels. Also secure the harness with zip ties so the wiring doesn?t slap against plastic trim.
Wrap-Up: Next Steps for a Safer, Cleaner Install
If your commercial vehicle has flickering hazards, intermittent strobes, or a mystery rattle behind the dash, the flash unit case and mounting should be on your short list. Start by identifying your flash unit type, checking connector fitment, and confirming you have a secure, vibration-resistant mounting solution. If you?re upgrading to LEDs or adding warning lights, choose a controller and case designed for the load and the environment your vehicle actually sees every day.
- Inspect your current flasher/controller mounting this weekend
- Replace broken clips, cracked housings, and loose brackets
- Upgrade to LED-compatible flashers where needed
- Re-route and secure wiring for a factory-clean interior finish
For more interior-focused how-tos, wiring-friendly installation tips, and practical gear guides, explore the latest articles on carinteriormix.com.